RapidOCR_API_Torch_GPU
基于 ONNXRuntime、OpenVINO、PaddlePaddle 和 PyTorch 的超棒 OCR 多编程语言工具包。
 1
10元/小时
v0.1
RapidOCRAPI_Torch_GPU
镜像简介
本镜像是基于多种深度学习框架(ONNXRuntime、OpenVINO、PaddlePaddle、PyTorch)构建的高性能OCR识别API服务。通过GPU加速,它能快速、准确地将图片中的文字转换为可编辑文本,并提供便捷的API接口供外部程序调用。适用于文档数字化、信息自动化提取、内容审核及多场景文字识别等任务,为开发者提供稳定高效的文字识别后端解决方案。
- 该镜像为
rapidocr_api部署的GPU版本。采用的是PyTorch GPU版本作为推理引擎。
镜像使用教程
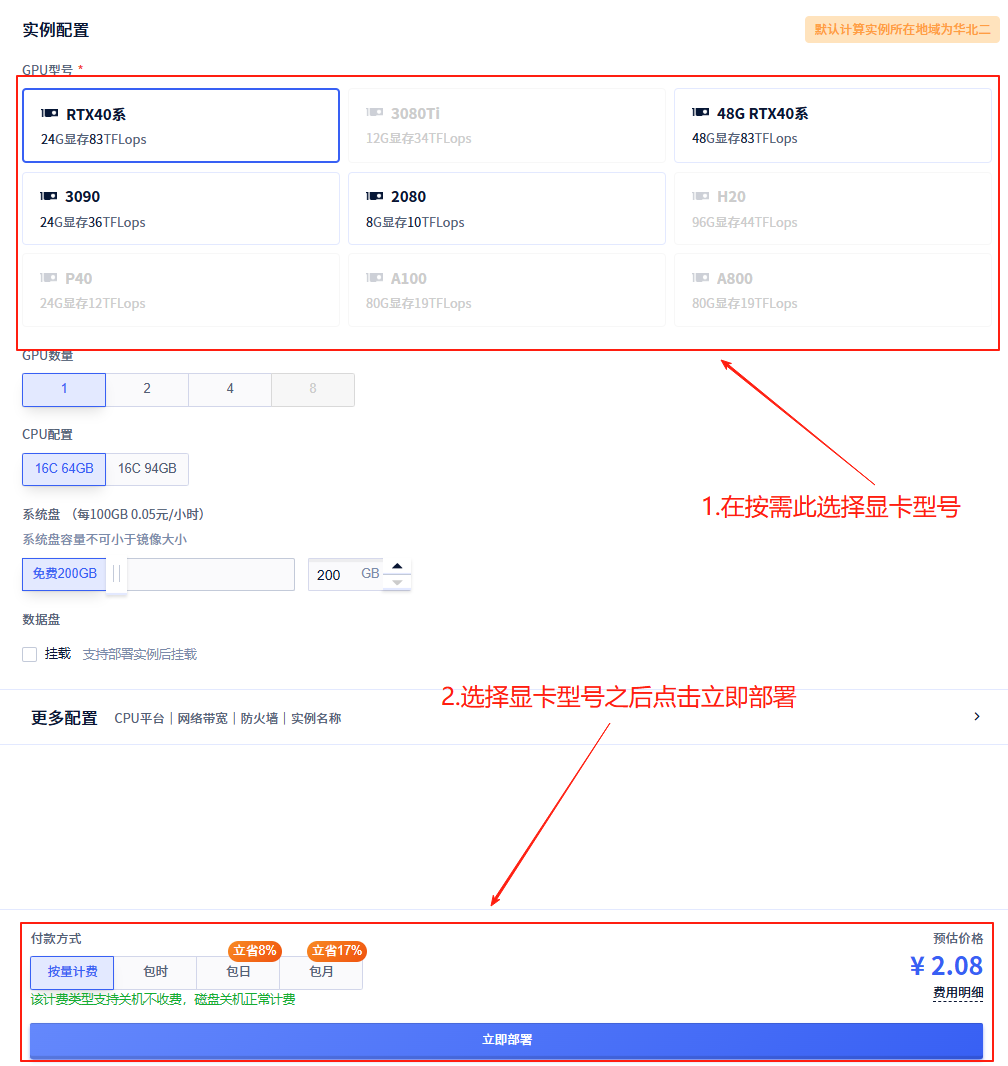
1、选择RapidOCR_Torch_GPU的云端镜像创建实例

2、然后在这里选择显卡并部署,推荐选择4090
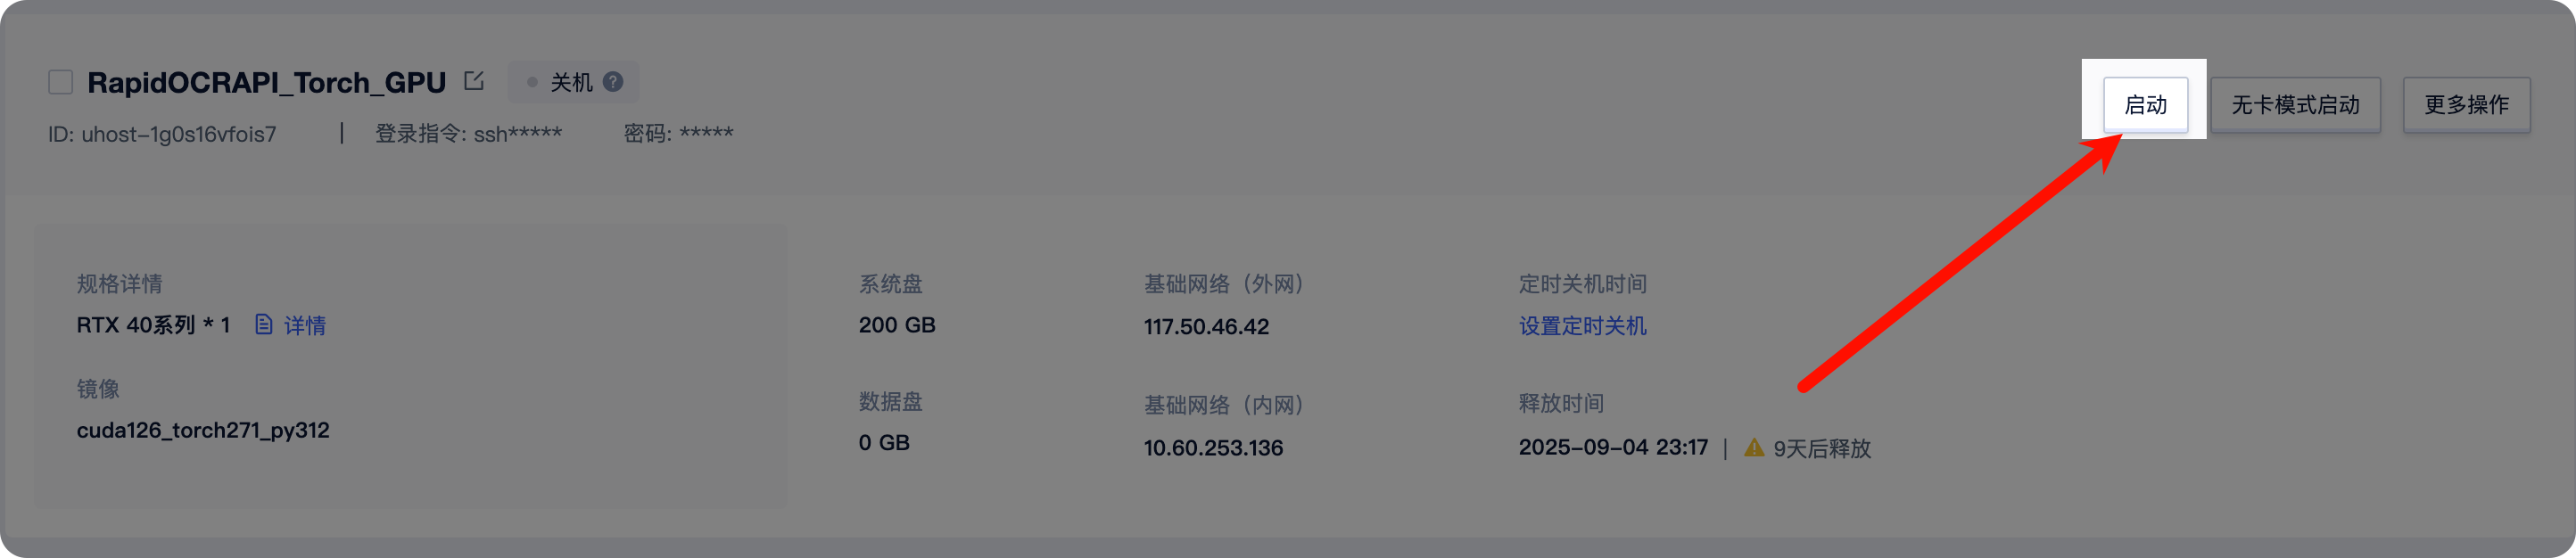
3、点击开机并启动
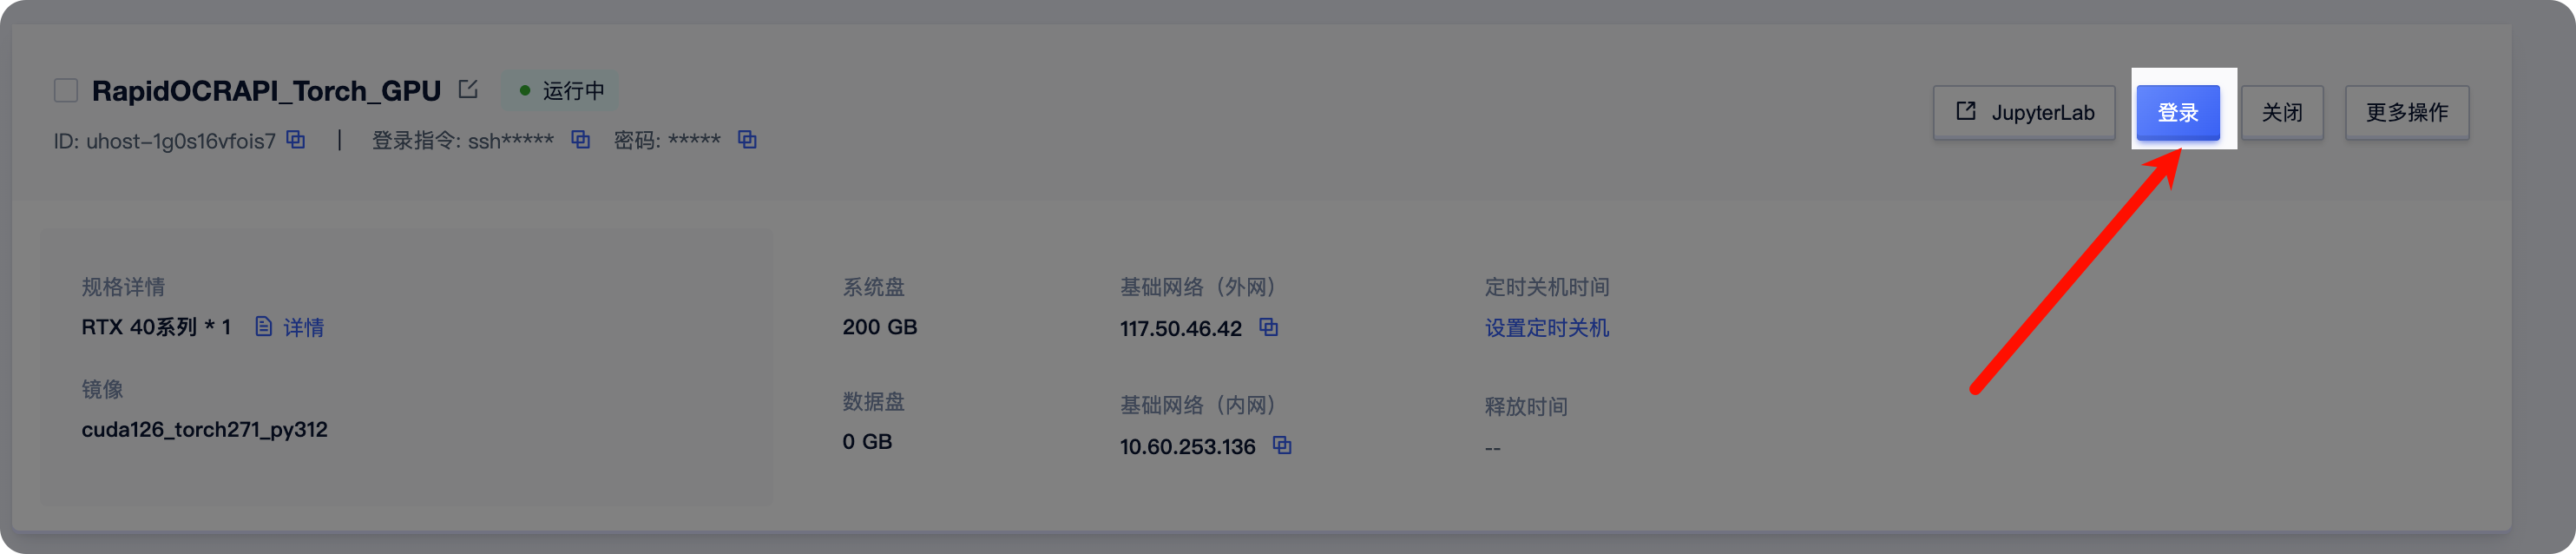
4、点击登录
5、进入镜像里面,执行rapidocr_api:
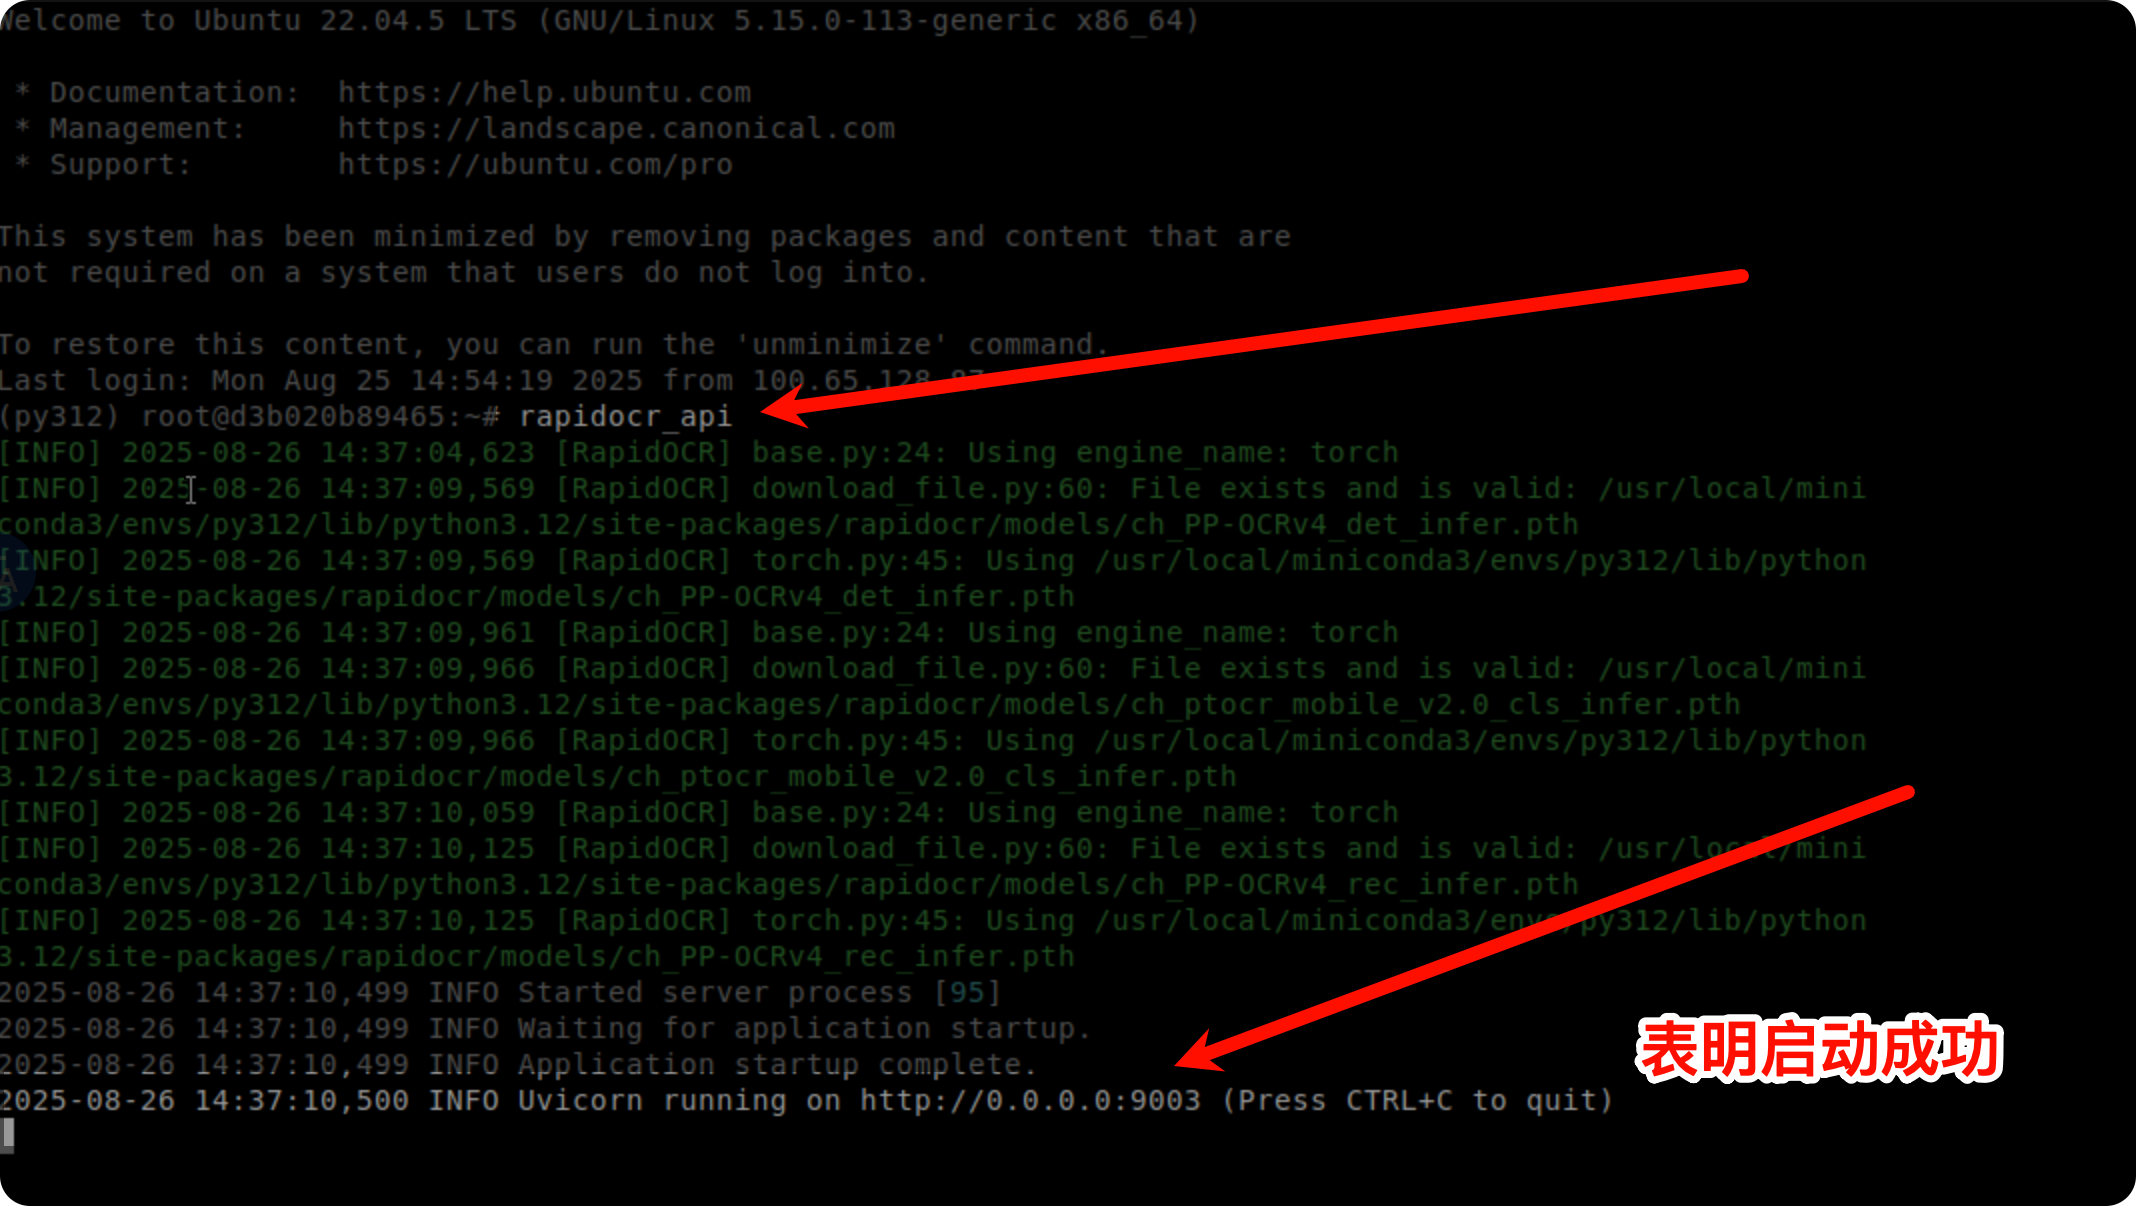
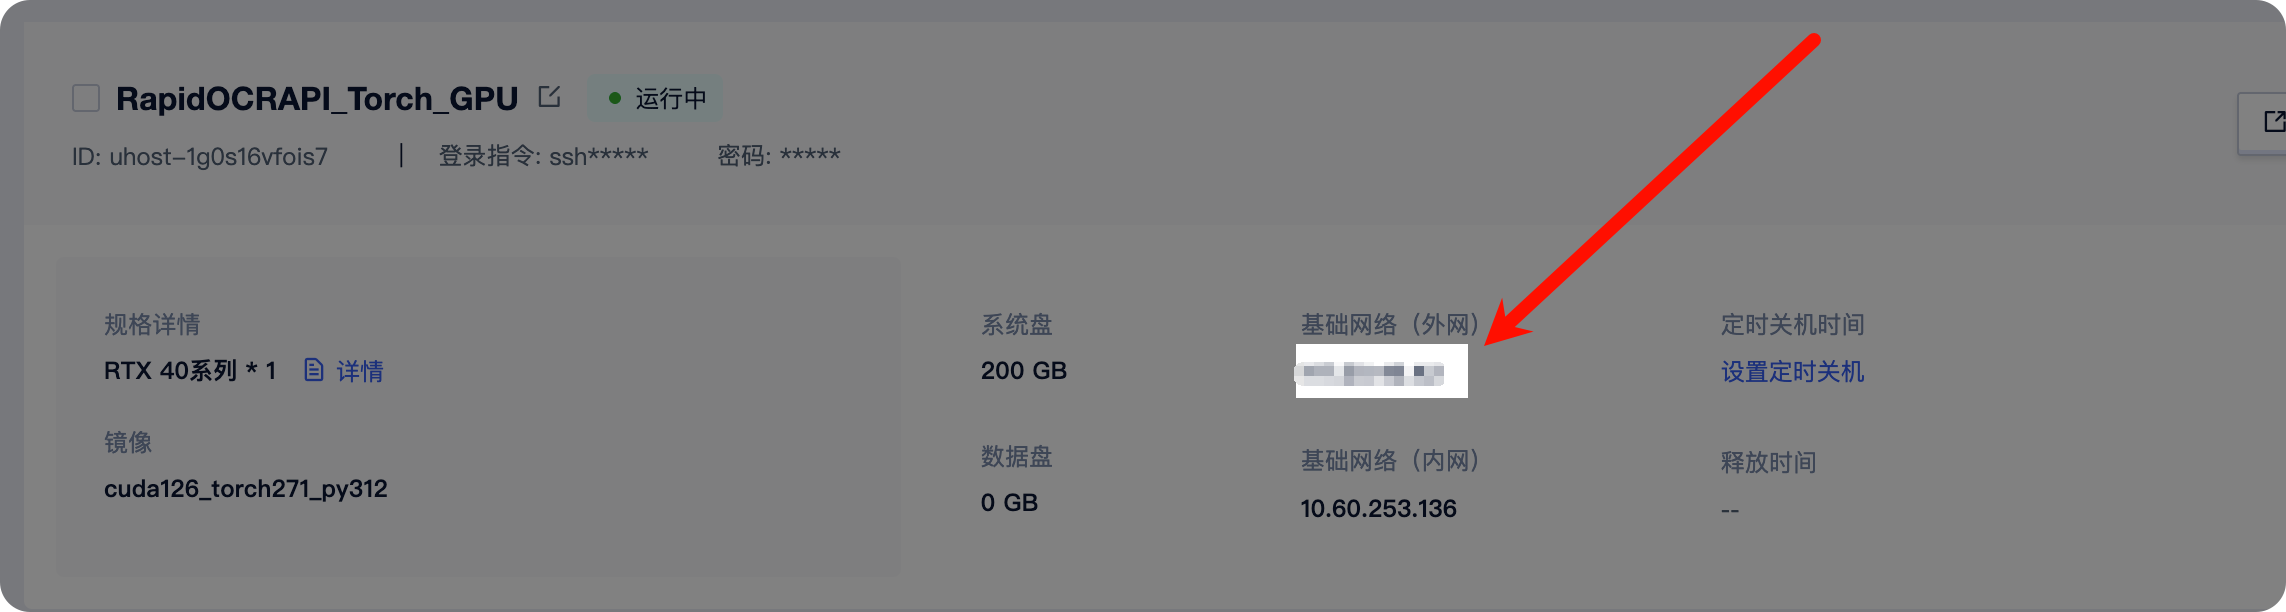
6.、查看启动镜像的外网ip:
客户端使用方法
⚠️注意:下面的IP地址需要更换为启动该实例后的外网IP
💻 命令行使用:
curl -F image_file=@1.png http://0.0.0.0:9003/ocr
🐍 Python脚本使用:
import requests

url = 'http://localhost:9003/ocr'
img_path = 'tests/test_files/ch_en_num.jpg'

with open(img_path, 'rb') as f:
    file_dict = {'image_file': (img_path, f, 'image/png')}
    response = requests.post(url, files=file_dict, timeout=60)

print(response.json())
@SWHL 认证作者
认证作者
认证作者
镜像信息
已使用5 次
运行时长
10 H
镜像大小
30GB
最后更新时间
2026-02-02
支持卡型
RTX40系20803080Ti309048G RTX40系2080TiH20A800P40A100RTX50系V100S
+12
框架版本
CUDA版本
12.6
应用
JupyterLab: 8888
自定义开放端口
9003
+1
版本
v0.1
2026-02-02